![]()
Package managers and virtual environments
Core Module
Python's extensive package ecosystem is a major strength. It's rare to write a program relying solely on the Python standard library. Therefore, package managers are essential for installing third-party packages.
You may be familiar with pip, Python's default package manager. While suitable for basic use, pip alone lacks
crucial features for professional development: integrated virtual environment management. Virtual environments prevent
dependency conflicts between projects. For example, if project A requires torch==1.3.0 and project B requires
torch==2.0, installing both globally creates a problem - only one version can exist in the global environment at
a time.
Virtual environments solve this by creating isolated Python installations for each project. Several modern package managers combine dependency management with virtual environment handling. Popular options include:
| 🌟 Framework | 📄 Docs | 📂 Repository | ⭐ GitHub Stars |
|---|---|---|---|
| uv | 🔗 Link | 🔗 Link | 78.5k |
| Poetry | 🔗 Link | 🔗 Link | 34.2k |
| Pipenv | 🔗 Link | 🔗 Link | 25.1k |
| Hatch | 🔗 Link | 🔗 Link | 7.1k |
| PDM | 🔗 Link | 🔗 Link | 8.5k |
| Rye | 🔗 Link | 🔗 Link | 14.3k |
The lack of a standard dependency management approach, unlike npm for node.js or cargo for rust, is a known
issue in the Python community.

This course doesn't mandate a specific package manager, but using one is essential. If you're already familiar with a package manager, continue using it. The best approach is to choose one you like and stick with it. While it's tempting to find the "perfect" package manager, they all accomplish the same goal with minor differences. For a somewhat recent comparison of Python environment management and packaging tools, see this blog post.
For this course, we recommend uv. It is rapidly becoming the de facto standard in the Python community due to its
speed, ease of use, and comprehensive feature set. It combines the best aspects of traditional tools, allowing you to
create virtual environments, manage dependencies seamlessly, and handle multiple Python versions with ease.
Historical note: conda and pip
Prior to 2026, this course recommended using conda for creating virtual environments combined with pip for
installing packages. While conda remains a valid tool (especially in data science and scientific computing),
we have transitioned to uv as the primary recommendation due to its superior performance, modern design, and
unified approach to Python project management. If you encounter older tutorials or StackOverflow answers
mentioning conda or pip, know that uv provides equivalent (and often better) functionality.
Python dependencies
Before we get started with the exercises, let's first talk a bit about Python dependencies. Modern Python projects
typically specify dependencies in a pyproject.toml file, which is the standard defined in
PEP 518 and PEP 621. This file contains
project metadata and dependency information in a structured format.
When specifying package versions, you can use several operators:
[project]
dependencies = [
    "package1",              # any version
    "package2 == 1.2.3",     # exact version
    "package3 >= 1.2.3",     # at least version 1.2.3
    "package4 > 1.2.3",      # newer than version 1.2.3
    "package5 <= 1.2.3",     # at most version 1.2.3
    "package6 < 1.2.3",      # older than version 1.2.3
    "package7 ~= 1.2.3",     # install version >=1.2.3 and <1.3.0
]
In general, all packages (should) follow the semantic versioning standard, which means that the
version number is split into three parts: x.y.z where x is the major version, y is the minor version and z is
the patch version. Specifying version numbers ensures code reproducibility. Without version numbers, you risk API
changes by package maintainers. This is especially important in machine learning, where reproducing the exact same model
is crucial. The most common alternative to semantic versioning is calendar versioning, where the
version number is based on the date of release, e.g., 2023.4.1 for a release on April 1st, 2023.
Finally, we also need to discuss dependency resolution, which is the process of figuring out which packages are compatible. This is a complex problem with various algorithms. If a package manager takes a long time to install a package, it's likely due to the dependency resolution process. For example, attempting to install
would fail because there are no versions of matplotlib and numpy under the given constraints that are compatible
with each other. In this case, we would need to relax the constraints to something like
to make it work.
❔ Exercises
-
Download and install
uvfollowing the official installation guide. Verify your installation by runninguv --versionin a terminal, it should display theuvversion number. -
If you have successfully installed
uv, then you should be able to execute theuvcommand in a terminal. You should see something like this: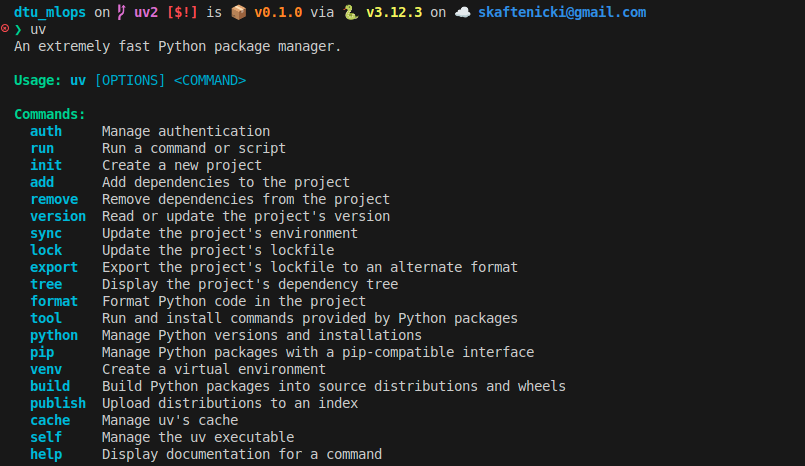
-
I cannot recommend the uv documentation enough. It will essentially go through all the features of
uvwe will be using in the course. That said, let's first try to see how we can useuvto create virtual environments and manage dependencies:-
Try creating a new virtual environment called
.venvusing Python 3.11. What command should you execute to do this?Use Python 3.10 or higher
We recommend using Python 3.10 or higher for this course. Generally, using the second latest Python version (currently 3.13) is advisable, as the newest version may lack support from all dependencies. Check the status of different Python versions here.
-
After creating the virtual environment, a folder called
.venvshould have been created in your current directory (check this!). To run a script using the virtual environment, you can use theuv runcommand:you can think of
uv run=pythoninside the virtual environment. -
uv pipis a drop-in replacement forpipthat works directly within the virtual environment created byuv. Try installing a package usinguv pip, for examplenumpy. -
Instead of calling
uv runevery time you want to execute a command in the virtual environment, you can also activate the virtual environment manually.which will change your terminal prompt to indicate that you are now inside the virtual environment. Instead of running
uv pip installanduv run, you can now simply useuv addandpythonas you would normally do. -
Which
uvcommand gives you a list of all packages installed in your virtual environment?
-
-
The above is the very basic of
uvand is actually not the recommended way of usinguv. Instead,uvworks best as a project-based package manager. Let's try that out:-
When you start a new project, you can initialize it with
uv init <project_name>, which will create a new folder with the given project name and set up a virtual environment for you(1): If you already have a pre-existing folder, you can also run
 uv initinside that folder to set it up as auvproject.
which files have been created in the
my_projectfolder and what do they do?Solution
The following has been created:
- A
.venvfolder containing the virtual environment as above - A
README.mdfile for documenting your project - a
pyproject.tomlfile for managing your project, more on this file later - a
hello.pyfile with a simple example script
-
To add dependencies to your project, you can use the
uv addcommand:which will install the packages in your virtual environment and also add them to the
pyproject.tomlfile (check this out!). An additional file have been created calleduv.lock, can you figure out what the purpose of this file is?Solution
The
uv.lockfile is used to ensure reproducibility between different users of the project. It contains the exact versions of all packages installed in the virtual environment, including sub-dependencies. When another user wants to set up the same environment, they can use theuv synccommand to install the exact same versions of all packages as specified in theuv.lockfile. -
Another, way to add dependencies to your project is to directly edit the
pyproject.tomlfile. Try addingscikit-learnversion1.2.2to yourpyproject.tomlfile. Afterwards, what command should you execute to install the dependencies specified in thepyproject.tomlfile? -
Make sure that everything works as expected by creating a new script that imports all the packages you have installed and try running it using
uv run. It should run without any import errors if the previous steps were successful. -
Something you will encounter later in the course is the need to install dependencies for the development of your project, e.g., testing frameworks, linters, formatters and so on, which are not needed for the actual execution of your project.
uvhas a built-in way to handle this:Try adding at least two development dependencies to your project and check how they are stored in the
pyproject.tomlfile. -
uvalso supports for defining optional dependencies e.g. dependencies that are only needed for specific use-cases. For example,pandassupport the optional dependencyexcelfor reading and writing Excel files. Try adding an optional dependency to your project and check how it is stored in thepyproject.tomlfile.Solution
in this case we are adding an optional dependency group called
dataframesand to that group we are adding the packagepandas. Check thepyproject.tomlfile afterwards.which will add the following line to your
pyproject.tomlfile:-
Optional dependencies are, as the name suggests, not installed by default when you call
uv runoruv sync. How do you install optional dependencies? -
Finally, how do you specify which optional dependencies should be installed when executing
uv run?Solution
You can specify this in the
pyproject.tomlfile under the[tool.uv]section (see docs):alternatively, setting
default-groups = "all"will install all optional dependencies by default.
-
-
Let's say that you want to upgrade or downgrade the python version you are running inside your
uvproject. How do you do that?Solution
The recommended way is to pin the python version by having a
.python-versionfile in the root of your project with the desired python version. This file can easily be created with the command: -
Assume you have a friend working on the same project as you and they are still using the older
pippackage manager withrequirements.txtfiles. How do you create arequirements.txtfile from youruvproject?Solution
Relevant documentation can be found here.
-
(Optional)
uvalso supports the notion of tools which are external command line tools that you may use in multiple projects. Examples of such tools areblack,ruff,pytestand so on (all which you will encounter later in the course). These tools can be installed globally on your system by using theuvx(oruv tool) command:which will install the
cowsaytool globally on your system and then execute it with the argument"muuh". Try installing at least one tool and executing it.
-
Alias uvr=uv run
I have personally found that typing uv run before every command can get a bit tedious. Therefore, I recommend
creating a shell alias to simplify this. For example, in bash or zsh, you can add the following line to your
.bashrc or .zshrc file:
and then you can simply use uvr instead of uv run.
🧠 Knowledge check
-
Try executing the command
based on the error message you get, what would be a compatible way to install these?
This ends the module on setting up virtual environments. The project-based approach with uv ensures that your
dependencies are properly managed and reproducible across different machines and collaborators.